The secret to fixing Blender to After Effects frame rate problems.
Have you ever imported your rendered frames from Blender into After Effects and the video plays back at the wrong speed? I'm gonna give you a simple fix and keep this short and quick.
TLDR version:
Blender and AE need to use the same frame Rates. Match the composition Frame Rate in AE to your Blender Frame Rate. Then re-import your frames from Blender by Right Clicking the image sequence, and use the ‘Replace Footage’ button. The rendered frames from Blender should now import into the composition at the correct frame rate.
I'll go through the steps below.
Find Blender and After Effects Frame Rates:
How to change Blenders Frame Rate
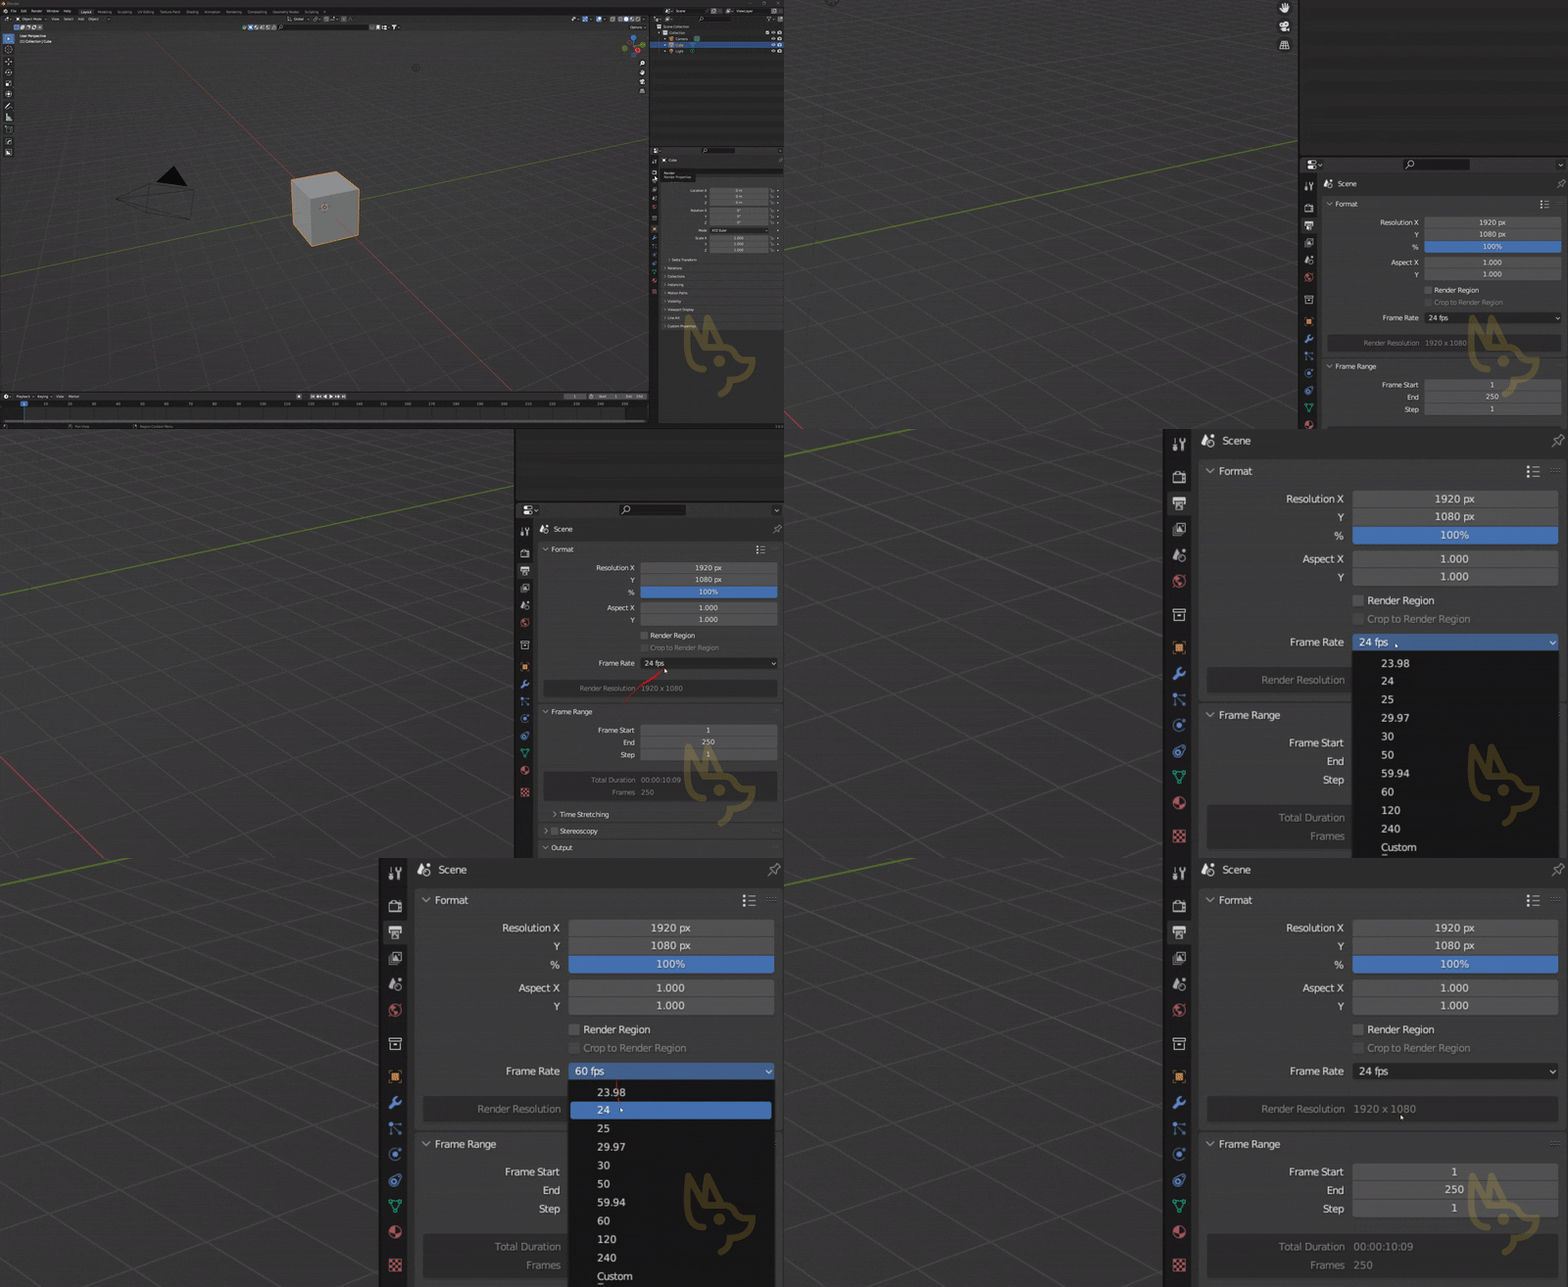
You need to know the Frame Rate your scene is set to. In Blender, you can find your frame rate in your 'Output properties' then under 'Format' there is a dropdown menu that says 'Frame Rate'. This will have the number you're looking for.
Editor Type > Output Properties > Format > Frame Rate
Look for the number in the drop down menu labeled:
'fps' (frames per second)
Blender uses '24 fps' by default.
This means 24 Frames Per Second. If you would like a different frame rate, all you have to do is update it, and then adjust your animation to fit your new frame rate.
I recommend setting your frame rate before you start animating
Your After Effects Composition also needs to be playing at the same Frame Rate. I'll show you how to find that next.
How to change After Effects Frame Rate
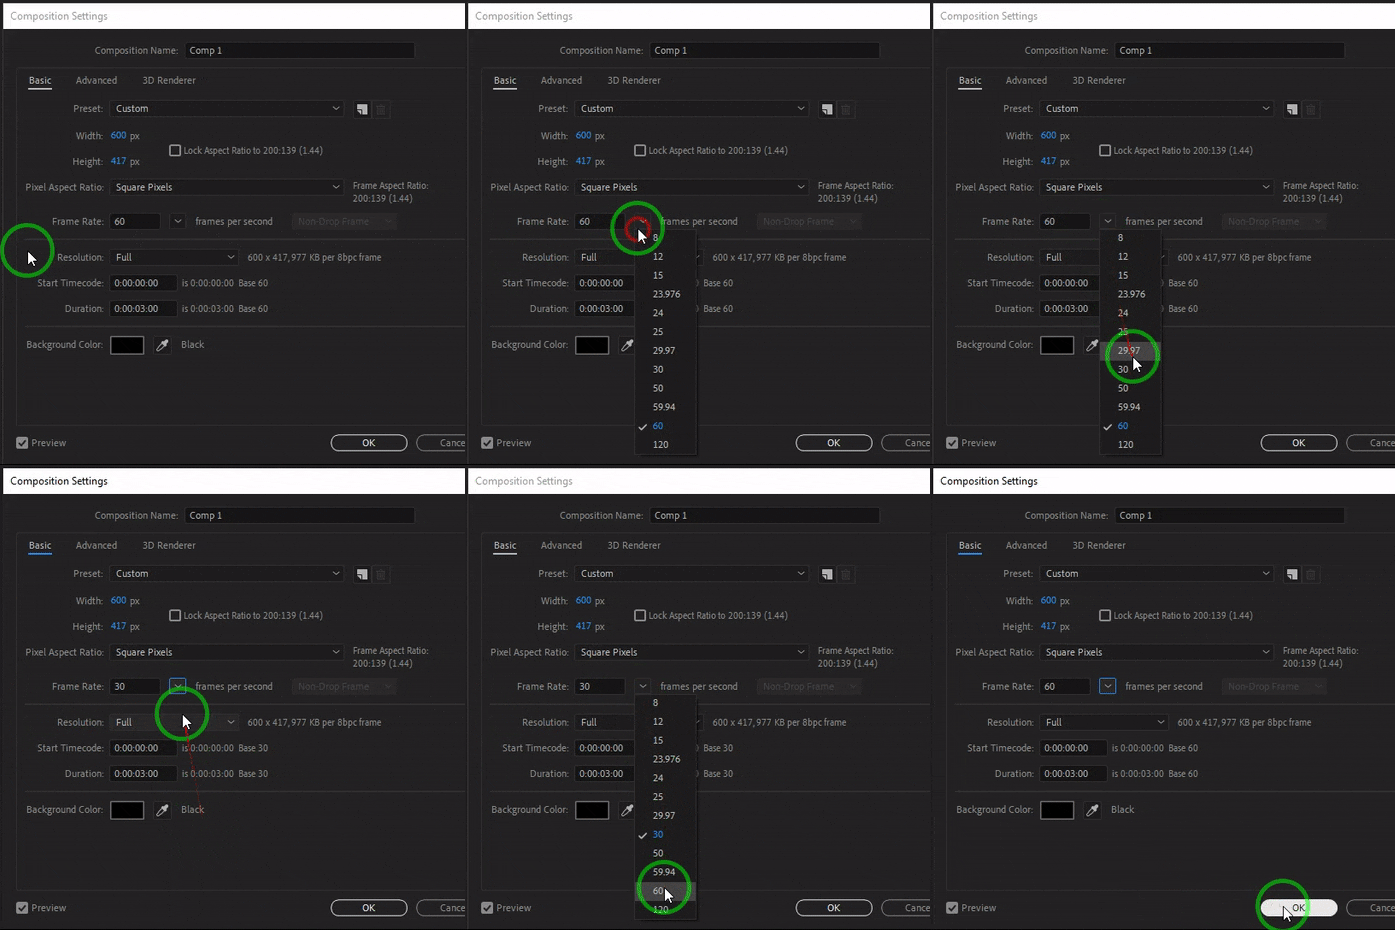
In After Effects, go to the navigation menu at the very top of the window and find 'Composition'. From Composition, locate Composition Settings, and select it.
You can also type CTRL + K on your keyboard. Or ⌘ + K on Apple Devices.
Under the Basic menu within Composition, there is a dropdown menu labeled 'Frame Rate:' followed by a number, as well as the drop down button, followed by the text 'frames per second'
Then, you can either type in the Frames Per Second, or select from the dropdown menu.
How to re-import frames into After Effects.
Once your Blender and After Effects Frame Rates are confirmed the same, Re-import the frames using Replace Footage in After Effects, you can follow these steps:
In the Project panel, select the image sequence that you want to re-import.
Right-click on the selected image sequence and choose Replace Footage > File.
In the Import File dialog box, navigate to the folder containing the frames that you want to import.
Select the first frame of the sequence and make sure that the Image Sequence checkbox is selected.
Click Open to import the frames. That’s it!
After following these steps, the frames should be re-imported into After Effects.
Want to replace the existing image sequence with the new one?
Go to the Project panel, Choose Replace Footage > Layer and select the new image sequence.
This will replace the old sequence with the new one while preserving any effects or key frames that you have applied to the sequence.
After Effects will use your Composition settings upon the new import.
By following the simple steps outlined in this document, you can ensure that your Blender and After Effects projects are synced with the same frame rates. This will save you time and frustration by avoiding incorrect playback speeds and the need for re-rendering. With this solution, you can improve your workflow and focus on creating high-quality animations and visual effects. Don't let frame rate problems slow you down - use this guide to fix them quickly and easily.


